Boxing Shoot for Sekonic Light Meters

Luis F. Castillo shadow boxing at Undisputed Fitness in Santa Fe, New MexicoEarlier this year, at the end of the summer, I shot an assignment for Sekonic light meters to show how the Sekonic L-478DR-U-EL light meter works seamlessly with Elinchrom strobes. For this assignment, we chose a studio setting and I worked with a trio of boxers from Undisputed Fitness here in Santa Fe, New Mexico. The boxers, Nate Harris, Luis F. Castillo (pictured above) and Reuben Rivera, are wicked fit and were great to work with on this shoot. As you will see in the images below, we shot some “standard” type portraits and then really got creative with in-camera multiple exposure images. But since the whole point of this shoot was to highlight the Sekonic light meter we were also filming a behind the scenes video to go along with the images.

The main setup used for this shoot can be seen below. This was a pretty standard three light setup with two edge lights in the back separating the boxer from the black background and a large octa softbox filling in from camera right in front of the subject. For the background lights, I used one Elinchrom Indirect Litemotiv Recta on one side and a 30-dgree grid spot on the other side. The big softbox in front was an Elinchrom 120cm Litemotive Octa, which is a gorgeous light modifier. For light, I used a couple of the Elinchrom ELC Pro HD strobes along with an Elinchrom ELB400. All of this was triggered with the Elinchrom Skyport Plus HS transmitter. The reason I am going into such great detail here is to show that the Sekonic light meter talks to both the strobes (all Elinchrom flavors) and also to the Skyport transmitter so that all of them are on the same page. I can take readings with the Light meter, change the power settings on any or all of my strobes, and the strobes and the Skyport will talk to each other and adjust the power settings in sync so that everything is on the same page.

A004_C062_0731QN.0000992FA004_C005_0731CU.0000471FA004_C047_0731MH.0000803FThe Sekonic L-478DR-U-EL (that is a mouth full) is an incredibly powerful light meter. In the standard mode it is very easy to use. You simply touch the screen and power your lights up or down and then push the button on the side to take a meter reading. On all of the Elinchrom strobes, it is possible, and fairly easy, to put each of them into individual radio frequency groups. The light meter can handle up to four groups. With the strobes set up this way, you can touch the screen and adjust the power setting of each group individually. Also, the light meter will show you the exact f-stop reading for each group so you can build your lighting set up quickly and efficiently–all the while knowing the exact lighting ratios between all of the groups. As you can see in the image above, I had the three strobes set up in three groups and dialed in the back lights so that they has the same power output. In this example, the rim lights (Back lights) were approximately a half stop brighter than the front fill light.

Once we got everything set up and dialed in, we concentrated on the images. Initially, I focused on portraits like the one shown below of Reuben Rivera, and shot those with the Hasselblad H5D 50c WiFi. I did shoot some action with the Hasselblad as well, like the top image in this blog post, but then switched to the Nikon D810 when the action started heating up – and for the multiple exposure capabilities built into that camera.

A portrait of Reuben Rivera at Undisputed Fitness in Santa Fe, New Mexico

I always use a light meter when I work with strobes. I just don’t get why you would not use a light meter. They aren’t that expensive when compared to the camera and lighting equipment. And with a light meter right off the bat you get a perfect exposure with no guess work. Of course, the light meter reading is only a starting point depending on what look you are going for. But, when I am on a set with an art director, the athletes and other crew, and sometimes the client themselves, the last thing I want to do is have to take five to ten shots where I am guessing at the exposure to figure out my camera settings. I look a lot more professional using a light meter and nailing it on the first shot is just a hell of a lot easier than guessing. Plus using a light meter allows me to dial in the lighting to the aperture I want to use straight away without any guess work.

Before the shoot, I came up with the concept of doing a series of multiple exposure images and then piecing the various multi-exposure images together in Photoshop. Once we got rolling on that series of images, we really started to hit the mark. The boxers seemed pretty stoked on the images and I worked with each of them to create a variety of multiple exposure images. I also have to say the in-camera multiple exposure mode of the Nikon D810 (and it is the same on most pro Nikons) is pretty incredible. There is very little post-production on these images. I only did a little tone mapping and darkened the black background slightly to get the images you see here.


mclark_nmuf_0716_230_comp1v2Luis F. Castillo shadow boxing at Undisputed Fitness in Santa Fe, New MexicoI am not sure myself which of the above composites (of two multi-exposure sequences) is my favorite. If you have an opinion please let me know your thoughts in the comments below. My gut leans towards the top one or the bottom one. I have to say that all of them look pretty cool. I was trying to convey the bobbing and punching movement of a boxer in a still image.

In the end, we got some great images and we really showed just how powerful it is to have a stellar light meter to work with. If you use Elinchrom strobes and are looking for the best possible light meter to use with your strobes, look no further. The Sekonic L-478DR-U-EL is an amazing light meter with a very deep set of functionality and a super cool touch screen. And until December 30th, you can get $50 off and free shipping through Mac Group. My thanks to Sekonic and Mac Group (the USA distributor for Sekonic and Elinchrom) for this assignment. My thanks also to Bill Stengel for the behind the scenes video footage and of course to Nate, Luis, and Reuben for working so hard to help us create these images.
Add a comment...

Your email is never published or shared. Required fields are marked *

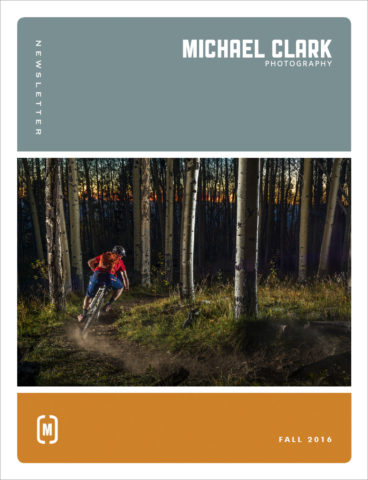
Fall 2016 Newsletter

fall_2016_cover_retinablog

The Fall 2016 issue of the Michael Clark Photography Newsletter is now available for download. If you’d like to sign up for the Newsletter just drop me an email and I’ll add you to the mailing list.

This issue includes an editorial about my recent travels, jet-lag and surgery, a review of Pro Media Gear’s Elinchrom ELB400 cage and Matthews Road Rags, an article detailing a recent assignment with New balance, an editorial entitled “Staying Curious,” and much more.

The Michael Clark Photography Newsletter goes out to over 8,000 thousand photo editors, photographers and photo enthusiasts around the world. You can download the Fall 2016 issue on my website at:

http://files.michaelclarkphoto.com/fall_2016.pdf

If you’d like to check out back issues of the newsletter they are available here.

Please note that the newsletter is best viewed in the latest Adobe Acrobat reader which is available for free at www.adobe.com.

Add a comment...

Your email is never published or shared. Required fields are marked *

Reality Check

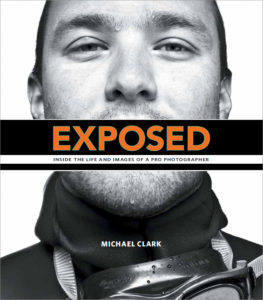
exposed-cover-2016While revamping my website recently it was decided to take down a few of the stories I had on my portfolio website to simplify it a bit. I wanted to repost this insight into the life of a pro photographer here on the blog, and just now have finally gotten around to doing so. This is the first chapter from my book Exposed: Inside the Life and Images of a Pro Photographer (cover shown at left). Originally written in 2001 and entitled “Reality Check,” this article was updated in 2010 and then against was updated for Exposed in 2012. If you would like more information on Exposed and my other books please visit the Books section of my website.

Control is a myth. I realized that five days into a three-day assignment in Joshua Tree National Park. The soggy walls of my mountaineering tent didn’t bode well for a rosy-fingered dawn. I’d been up at 5 a.m. for five days straight trying to get first light on a particular landscape. It had been raining sideways all five days, and I had yet to shoot more than a dozen images.

The campground was empty save for my friends Kurt and Elaina Smith, both of whom are phenomenal rock climbers. I spent five days hiking around in the rain checking angles and the setup for hundreds of different images. The best photo op I had was shooting inside Kurt and Elaina’s warm and cozy van, which doubles as their home. If not for the satellite TV and DVD player in their van, we would have gone berserk. Luckily, the morning of the sixth day dawned clear, and I was in position when first light hit the rock arch that I had been trying to photograph for six days. I spent the next few days shooting other images for the assignment and also some images of Kurt and Elaina rock climbing.

Fortunately, not every assignment is as laborious and frustrating as the one in Joshua Tree was. I am constantly amazed at how well many of my assignments go, especially considering that almost all of my work is shot outdoors. For much of my adventure sports work, the athletes need fairly specific conditions to perform at their best—or to even do what they do at all. Rock climbers generally don’t climb in the rain, downhill mountain bikers need calm weather to jump off huge cliffs, and likewise, BASE jumpers also need calm winds to jump. Time and time again when I’ve had big assignments the weather has cooperated, at least long enough for me to get what I needed.

My assignments can range from an afternoon near my office in Santa Fe, New Mexico, to weeks on end in remote corners of the world. I usually travel at least six or seven months a year. The rest of the time I am in the office talking with clients, pursuing work, editing and processing images, keeping up with the accounting, or sending out submissions and invoices to clients. There are no regular “hours.”

exposed-chapter1_openingspread
Above: The Opening spread of Chapter One in my book Exposed:Inside the Life and Images of a Pro Photographer

I started out shooting primarily rock climbing and mountaineering, and then I slowly branched out and started shooting all of the other adventure sports. With my background in adventure sports, clients have also called on me to shoot assignments that involve risky situations. For that reason, I’ve always included a workout as part of my workday when I’m back in the office so I can stay fit enough to get the shot while out in the field with world-class athletes. I don’t pretend be a world-class athlete, but I am in good enough shape to do what I need to do.

Almost always I’m carrying more equipment than the people I am with, and in most cases I need to be ahead of them to get the images I want. As an example, a normal day shooting rock climbers involves at the very least a 70- to 80-pound backpack. On big wall excursions, carrying up to 120 pounds is not uncommon, and by big wall I mean cliffs that are anywhere from 1000 to 4000 feet high—like El Capitan in Yosemite National Park. Shooting on big walls usually involves carrying loads of ropes and hardware up the backside of the cliff. Often, it takes more time to set up for a shot than it does to actually take it.

I tend to go very light (in terms of photography equipment) so the pack doesn’t get too heavy. Now, in the digital age, my main kit for just about any “adventurous” shoot is a Nikon D4 (or D810), three or four lenses, a small flash, and plenty of memory cards. My main kit includes three zooms: a 14–24mm f/2.8, the 24–70mm f/2.8, and a 70–200mm f/2.8. More often than not, I’ll bring a Nikon D810 as back up, especially in remote places and when I’m on assignment. With a closet full of camera bags, and depending on the shoot, I’ll choose the most appropriate camera bag(s) and pack the basic kit in it. When I’m shooting rock climbers, for instance, I take at most two or three lenses. If I am on a rope, I am usually fairly close to the climbers, so the Nikon 14–24mm f/2.8 wide-angle zoom and the Nikon 24–70mm f/2.8 medium-range zoom are my go-to lenses in that situation. Of course, depending on the sport I am shooting, I tailor my kit and how I carry it. For sports like surfing or whitewater kayaking, I might not carry as much gear while shooting, but often I have more equipment back in the car if needed. If I am using artificial lights, the amount of gear involved on a shoot can balloon to a few hundred pounds or more, and that usually requires an assistant (or two) just to get everything to the location and set up. Using large, battery-powered, studio strobes on location can certainly complicate a photo shoot, but it can also very easily set those images apart from anything else in the industry—and that is precisely the reason to use them.

For some situations, it isn’t about how much gear you take but how little you can get away with. When shooting in very remote locations, I trim down the kit to one body and one or two lenses depending on the sport. In the mountains I trim it down even more. The less gear I carry, the more it forces me to become creative. And I really prefer to be unencumbered when shooting. No matter how much gear I have with me, when I start shooting in earnest, I have only one camera around my neck. I’ll ditch the camera bag and come back to it if I need to. Having a camera bag hanging off me doesn’t allow me to move and explore the location like I do naturally with a single camera and lens.

No matter how much gear you have (or how little), shooting an assignment is hard and stressful work. You have to come back with “the shots,” and the shoot doesn’t always go as planned. Throw in the fact that I’m often working on ropes and hanging thousands of feet off the deck, and you start to get the picture, no pun intended. It can take a lot of time just to get into position, and sometimes I wonder if my success as an adventure photographer is directly related to my ability to coax athletes to get up early, warm up on their hardest projects, and to do it “one more time” over and over again.

Many of the athletes I work with have become close friends. To capture what they are experiencing, I must be there with them, and that isn’t always pleasant. Most of the time we are camping, and sometimes even simple amenities like a shower seem a world away. National Geographic’s photo editor, Kent Kobersteen, summed it up when he said, “The really strong photos come from those situations where the last thing you want to do is take pictures—when everything is going to hell, when the storms are raging and everyone is trying to hang on. Those are going to be the most telling images.”

I am also always aware of the sudden “courage” athletes gain when a camera is pointed at them. To date, I’ve not had anyone get seriously injured on a photo shoot, but there have been some very close calls. I’ve seen a kayaker under the water for 12 minutes, a mountain biker jump off a 40-foot cliff and crash hard, and rock climbers take serious risks. The kayaker survived because of his wise decisions and with the aid of his experienced companions. The mountain biker was scraped up a bit and his rear wheel exploded when he hit the ground, but amazingly, he was unhurt. And although I’ve seen a few really scary rock-climbing falls, some of which resulted in extensive injuries, I’ve never seen anyone permanently injured. Just as with my career, in the sports I photograph, everything is a risk—albeit a “calculated” risk.

The reality is that there is precious little I can control on most of my photo shoots aside from coordinating the action or modifying the light. In addition, freelance photographers might soon be a dying breed. The competition is fierce in this business, and corporations are always asking for more usage rights with no extra compensation. There is more competition in this industry than ever before, and photographers need to have a fair amount of business savvy as well as the ability to produce top-notch work.

On top of that, digital photography has revolutionized our industry, and photographers are taking on huge expenses they never had to deal with before. Digital has also brought with it a very steep learning curve, the opportunity to create images that were not possible before, and unprecedented control over the final image. And it is also making photography more exciting than it has been in a long time.

In the end, there is much more to working as a professional photographer than just capturing the images. Many photographers tend to make the work sound so glamorous. They leave out the unpleasantries like sleeping in airports, 90-hour workweeks, and the tough realities of owning your own business. In this era of ever-increasing expenses, dog-eat-dog competition, and shrinking assignment rates, you must work extremely hard and count perseverance as a good friend if you want to make it in this business. I would only recommend this profession to those obsessed with creating and sharing their images; to those who can’t imagine doing anything else.

Add a comment...

Your email is never published or shared. Required fields are marked *

In God’s Hands

While revamping my website recently it was decided to take down a few of the stories I had on my portfolio website to simplify it a bit. This story, from way back in 2003, is one of many stories I have about nearly buying the farm in the sky so to speak. If I have to add them up I have used up seven of my nine lives so far in my 20 year career as a professional adventure sports photographer. A few of those stories include: falling into quicksand in Patagonia, getting hit by a car on my road bike, being hit but a beach-ball size boulder, being hit by a basketball size piece of ice, and taking 20-foot fall that left my head only inches above the ground. Above and beyond any of these other exciting moments, this story of my rope getting cut while on assignment for Climbing Magazine is by far the closest call I have ever had. Because so many people have responded to this story over the many years it was on my website, I wanted to repost it here on the blog. Without further ado, here is the story entitled, “In God’s Hands,” that has been on my website up until it was revised this past summer:

The climbers and I started hiking at 5 AM that morning in the dark. This was the third day of an assignment I was shooting for Climbing Magazine in the Black Hills of South Dakota. It had already been a little rough with two days of difficult weather. I was in desperate need of good light and the bright stars were a good indicator that the dawn would be clear. Larry Shaffer and Cheryl Mayer had been recommended to me as the trad masters of the Needles, and they didn’t disappoint. Larry soloed the short first pitch (meaning he climbed without the use of a rope or any gear to protect him in the case of a fall) of East Gruesome Spire as I moved into position to shoot higher up in the gulley.

In the top of the gulley it was freezing cold and the wind was howling. I was shaking so violently I could barely keep the camera steady. My plan was to shoot East Gruesome Spire from the side at first light as the climbers ascended and then jumar to the top of East Gruesome to shoot across at the Eye Tooth. Though only rated 5.7, the Eye Tooth was spectacularly exposed and would give a very good feeling for what it was like to climb in the Cathedral Spires.

[Technical note: For those not aquainted with climbing techniques, jumaring, also known as jugging, is slang for ascending a fixed rope. It is a technique where the climber clamps mechanical ascenders onto the rope that slide upwards and lock with a camming device. Hence, with a pair of ascenders and some nylon webbing one can ascend a fixed rope without having to climb the rock face. Climbing photographers use this technique so they can get into position, freeing their hands to manipulate a camera.]

Around 8:30 AM I started jumaring to the top of East Gruesome Spire. My sixty-meter static rope hung free from the gently overhanging wall for the first hundred and sixty feet. I wanted to get in position as quickly as I could so the light wouldn’t get too harsh on the Eye Tooth. Thirty feet from the top I looked up to see my rope, twelve feet above me, bent over a large quartz crystal pointing straight out from the wall. My first reaction was to push off the wall and get the rope off the crystal. As I leaned out from the wall I noticed my rope seemed strangely thin where it ran over the crystal. I was looking at frayed core material. From my perspective it appeared I was hanging from one third of the rope’s sheath!

Michael Clark's partially severed static line after a very close call in the Cathedral Spires in South Dakota.

Above: Michael Clark’s partially severed static line after a very close call in the Cathedral Spires in South Dakota.

I wasn’t panicked. I was stunned. It was sobering to think that my life would be over so quickly. I immediately started to pray. One third of a sheath couldn’t hold me for more than a few seconds. I could already see my body falling away from the wall and I was anticipating how it would feel. Gravity would engage instantaneously. My thirty-five pound camera pack would act as ballast. Upon impact one hundred and eighty feet below, the camera pack would break my back and slam my head and feet onto the granite slabs. I would have two seconds at most. And I would be looking at the blue sky above me the entire time. I could hear the dull thud of my landing. And I was praying as I have never prayed before, certain that this was my time to die.

I tried to call up to the climbers, who were still on top. I had to forcibly clear my throat just to speak. When finally I yelled, it was with noticeable urgency. I asked them to lower a rope to me as quickly as they could and put me on belay. I remember Larry said, “give me a moment, this could take a little time.” I shouted back with a cracked and broken voice, “lower the rope NOW! I’ll tie in while you are putting me on belay.” Larry’s face popped over the top and he understood the situation immediately. I can’t remember how long it took to get the rope down to me. It felt like two or three minutes. I held myself as still as I could on the holdless wall waiting for the rope to break.

My mind was racing and I realized I was praying out loud. Verses I had memorized from the Bible were floating through my mind. “… to live is Christ, and to die is gain.” (Philippians 1:21) I can’t say I felt peace. Endorphins and adrenaline kicked in. I was on autopilot, praying without even thinking, confessing my sins and preparing myself for the end.

The rope end dropped just in front of my face. I made the fastest tie-in of my life, at the same time concentrating on my breathing to calm myself down. Once secured, I jugged up and past the cut. When I got to the cut I realized that some of the core was still intact but I just kept going. On top, Larry and Cheryl were looking at me, waiting for a reaction. My nervous comments gave away how I felt. Little else was said. Then they moved ahead with the plan, rappelling their ropes to start up the Eye Tooth. It appeared that the crystal had cut half way through the core. I would later find out, after cutting the rope open that I was hanging from three of the seven strands of the core.

mclark_sdcu_015

Above: Cheryl Mayer on the daunting and exposed Eye Tooth (5.8+) in the 4/5 gulley of the Cathedral Spires in Custer State Park in the Black Hills of South Dakota.

It was not until I was alone that I broke down. I started praying again, thanking God for His mercy. I must have prayed for twenty minutes or more. It seemed to calm me. And I knew I had to keep it together and concentrate on the images. Taking photographs was a diversion. I started to get excited about the images and it forced me to think about composition, exposure, and focus instead of what had just happened.

When it came time to rappel I was gripped. My faith in ropes had just taken a serious beating. I checked the anchors at least five times before I leaned back over the edge and once I was on the ground I felt a huge release. We continued shooting for the rest of the day but thankfully the architecture of the Spires was such that I could get above the climbers without having to get on a rope.

The next few days were intense after such a close call. Flowers looked brighter, the sky bluer and life seemed surreal. I realized that every moment from here on was a gift. I no longer felt invincible. And death didn’t seem so far away as it did before. It could come at any moment. And that forced me to stop and think about what is truly important.

A few days later, I was two hundred feet off the deck in the Cathedral Spires again. Needless to say it was mentally challenging. I knew the “money shots” would be from above on the second pitch in the late afternoon light. I forced myself up there even though my nerves were still frazzled. I said a prayer before I started jugging the second pitch that made everyone take notice at the belay. Once we started shooting I calmed down. I quickly realized these could be the cover shots for the article and that made me concentrate on the images.

mclark_sdcu_021

Above: Eric Sutton on the 5.12 second pitch of the Yellow Wall on Kayyam in the Cathedral Spires of Custer State Park, South Dakota.

To this day, I still get nervous when I hear rope rubbing on rock. But in retrospect, it has become a blessing. Every breath is a gift. Someday we will all die. I don’t know if I am ready, but I am getting prepared.

Writer’s note (from 2004): As I wrote this my heart was palpitating, my hands were shaking so much it was hard to type and I had goose bumps just remembering what it was like hanging, thinking and waiting. My shirt was soaked from sweat by the time I finished writing and I felt sick to my stomach. I was trying to put myself back there, in that situation to capture what it felt like and I was a little surprised at how well I could remember every detail of those three or four minutes.

(An edited version of this article was published in the 2004 Photo Annual of Climbing Magazine as “The Wake-up Call”)

Add a comment...

Your email is never published or shared. Required fields are marked *

Pushing the Limits: How to Make it as an Adventure Photographer

A few weeks ago I sat down and did an interview with Dale Sood of Vistek, which is Canada’s largest, professional photo, video and digital imaging store. They are also a distributor in Canada for a large number of high-end photography brands. Dale and I, as you will see in the video above, discussed a large number of topics including how I got started, how I work with professional adventure sports athletes and what it is like to work as a pro adventure sports photographer in this day and age.

I met Dale, and a good portion of the Vistek crew, last year while presenting at the Vistek ProFusion Expo in Toronto, which is the Canadian equivalent of the Photo Plus Expo. They are a great group of people and fun to work with. I hope you enjoy the video and get something out of it. I also invite you to ask questions here in this blog post and I will do my best to respond to them all.

Add a comment...

Your email is never published or shared. Required fields are marked *

A Workshop with the Legendary Albert Watson

8-2-16163235albert_watsonAll images kindly provided by Christopher Michels, who was one of many talented photographers in Albert Watson’s workshop. In the image above, Albert is discussing a lighting setup on the second day of the workshop. 

In August, I took a photography workshop with the legendary Albert Watson at the Santa Fe Photographic Workshops.  If you are a photographer and don’t know of Albert Watson, look him up. You have seen his work before. I guarantee it. He has been called one of the top 20 photographers of all time. That is some pretty rare air. He is also an incredibly personable and genuine person. And, he is one of a handful of photographers I would call a true lighting master. As is evident in his images, he sees light in a way very few photographers do or can. Hence, taking a workshop with Albert was a great honor and a huge learning opportunity.

This was the second photography workshop I have ever taken. It was also the highest level workshop I have ever been a part of. Everyone in the class was either a working pro or an extremely advanced amateur, but most were working pros. Once Albert started showing us his basic lighting techniques, most in the class were completely blown away, myself included. Even my good friend Robert Reck, one of the top architectural photographers on the planet and a fellow participant, was heard muttering, “I can’t believe it” after the first lighting demo. Most of Albert’s lighting is done with one strobe head and a beauty dish, and the light is then bounced off white and black foam core to create a custom lighting setup for each image. What he was able to create with a very affordable amount of foam core and several flags (used to block the light) was absolutely astounding.

I took this class to help push my portrait photography lighting skills to the next level and also to get a creative boost. In the workshop, we talked about a wide range of subjects and Albert also critiqued our work and websites in front of the whole class. While looking at my images for over an hour he loved a few of my portraits and harshly critiqued quite a few of them as well. The constructive criticism was what I was there for and it will help me work harder to create higher-end portraits.

8-1-16163035santa_fe_photographic_workshops

Above, I am in the hot seat. You might notice my nervous, awkward stare. I was sweating a bit more than normal as Albert critiqued my images. It isn’t often that you have a photographer of Albert’s stature and experience critiquing your work. He was honest and direct, just what I was looking for. I learned more about my portraiture in this one hour than I have in a long, long time.

During the workshop I took over 28-pages of notes. There were also a ton of pretty remarkable quotes that I wrote down. Below are a few of the best quotes from the week:

“If you learn one thing from me it is to analyze your pictures. You have to get into your own picture and really analyze the image as with a microscope. My one eye is a magnifying glass.”

[Sidenote: Albert has been blind in one eye since birth, which allows him to see and analyze images differently than those of us with stereo vision.]

“Good lighting is a matter of you moving the light and using your eyes to adjust the light.”

“The final proof is the image hanging on a wall. Do you love it or not?”

“Spend more time on the creative and on the conceptualization of the shoot than on equipment and gear. “

“Never in your life use one of those nasty silver reflectors. Burn them.”

“There is a great malaise with a lot of photography now. There is not enough homework done before the shoot and not enough thought put into the image.”

“One of the weakest things I see is photographers don’t use flags with their lighting.”

 “Try over the next year to concentrate on the images and the art, not the gear. Instead of looking at gear reviews spend your time looking at art and taking in as much art as possible to influence you.”

“The devil’s in the details.”

“Make memorable images, not postcards.”

“We need to rise above all the millions of cameras and rise above the fray and above the stratosphere.” – Albert speaking about creating memorable images that stand out from the crowd.

This workshop also happened to be the first five-day workshop that the Santa Fe Workshops has ever run where the participants did not shoot at all. This was intentional by design. None of us really needed to shoot anything. We were there to learn about Albert, his work and his methods. Hence, taking time to shoot our own images would have limited how much of his craft we could absorb. We could see how how he worked and replicate that process after the workshop if we wanted to create similar looks. For this workshop and the high level participants not having to deal with shooting images was fantastic.

8-2-16163615albert_watsonAlbert giving direction to one of our models for the afternoon. Unlike most photographers, myself included, Albert gets in close to his subjects and really looks at the way the lighting is falling across their face as his assistant(s) move the light. 

8-4-16164668albsert_watsonA Portrait of Keith Coleman, Albert’s 20-year assistant, who brought with him years and years of knowledge. 

One of my mantras is “Never Stop Learning.” If I ever did stop pushing to learn new techniques or expand my skill set I feel that my career would be in steep decline soon thereafter. Improving my portraiture, and my lighting skills, has been a decade-long endeavor so far and will likely continue for many more years to come. One of the big take aways from this workshop was not a photographic technique or any lighting setup per se, but the urging by Albert to think more artistically when creating images. Albert noted that we as photographers get so wrapped up in the technique that we often loose sight of the creative side. Going forward, I really want to push the envelope creatively more than I ever have. What that exactly means is something I am still figuring out. This, my 20th year as a professional photographer, has been quite busy but I have also taken the time to seek out and find inspiration.

This was Albert’s second time teaching a 5-day workshop. The last one was eighteen years ago and also at the Santa Fe Workshops. He has taught a one-day seminar in Europe but besides that he hasn’t taught any other workshops or seminars. My thanks to Albert Watson for taking time out of his incredibly busy schedule to inspire and challenge us all. Also, my thanks to Reid Callanan, the director of the Santa Fe Workshops for bringing Albert back to Santa Fe.


Add a comment...

Your email is never published or shared. Required fields are marked *

Annual Fall Fine Art Print Sale – 25% Off

25_off_fap_sale

To get the ball rolling for the fall holiday season, I am happy to announce a 25% off sale on all of my fine art prints until December 31st, 2016. How this works is very simple, just take 25% off my standard fine art print pricing, which can be found here, and contact me to order the print.

All of my images are available as Fine Art Prints. You can see which of my images are in the Limited Edition category on my website. Any images that are not shown on the Limited Edition page are considered Open Edition prints. Please note that these prices do not include shipping. If you have any questions about print sizes or available images please don’t hesitate to contact me. I will work with you to make sure the final print is the best it can possibly be and will look great mounted on your wall.

These archival prints are painstakingly created by yours truly on some of the finest papers available. I do not outsource printing to a third party printer because I want to have tight control over the quality of the final print, and I have not found a third party printer that can achieve the same level of quality that I can produce here in my office. The prints are made on Epson printers using a variety of papers including both fine art matte papers and baryta photographic papers. The printer and paper combination is chosen specifically for each image so that image will be rendered with the highest possible resolution and the widest color gamut. Our main papers are Ilford Gold Fibre Silk, Ilford Gold Cotton Textured and Ilford Fine Art Smooth papers.

Below are a few sample prints that I have made in the last few months to give you an idea of just how stunning these turn out when framed up.

framed-print-001


framed-print-002


framed-print-003-mediumformatPlease contact me with any questions or if you would like to look at a wider range of images than are featured on my website.


Add a comment...

Your email is never published or shared. Required fields are marked *