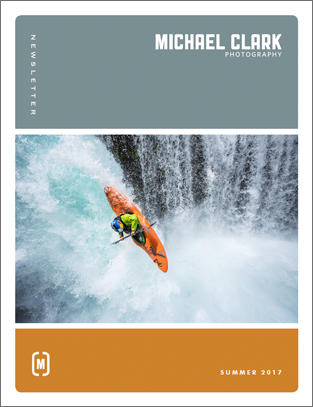
The Summer 2017 issue of the Michael Clark Photography Newsletter is now available for download. If you’d like to sign up for the Newsletter just drop me an email and I’ll add you to the mailing list.
This issue includes an editorial with recent news, a preview of the Elinchrom ELB 1200 battery-powered strobe, an article detailing a recent assignment for Elinchrom and Red Bull Photography, a recap of my recent CreativeLIVE course, an editorial entitled Misconceptions, and much more.
The Michael Clark Photography Newsletter goes out to over 8,000 thousand photo editors, photographers and photo enthusiasts around the world. You can download the Summer 2017 issue on my website at:
Sidenote: I realize I haven’t posted a blog in quite a while. The last few months have been crazy intense with numerous assignments, frantic image editing and long hours helping to edit video. Not to worry, I haven’t ditched the blog…there is much more to come in the next few weeks. This blog post is a bit long as this was one of the best assignments of my entire career and we got a wide variety of images.
Even though there have been numerous articles posted about the “Lighting the Spirit” whitewater kayaking shoot for Elinchrom and Red Bull Photography, I thought I would post a blog here detailing some of the aspects that have not been covered in the other articles that have appeared on Redbull.com, F-Stoppers, and elsewhere. First off, my thanks to Elinchrom and Red Bull Photography for making this happen. This shoot was a long-time coming. I originally discussed a possible ELB 1200 shoot with Elinchrom and Red Bull over two years ago after seeing one of the first ELB 1200 prototypes. This assignment, and the idea for this shoot, was a long process, that included a fair amount of debate and thinking, which I think can be seen in the images. Once we decided on the sport of whitewater kayaking, Red Bull introduced me to Rafa Ortiz, one of the world’s best whitewater kayakers–especially when it comes to dropping big waterfalls.
In discussions with Rafa, we decided on Spirit Falls, which is on the Little White Salmon river near White Salmon, Washington. I was a bit apprehensive about shooting at Spirit Falls because it has been photographed so many times and by many of my peers in the adventure sports photography world. Nevertheless, we needed a waterfall that was somewhat easy to access and one that Rafa and the crew could run over and over. In the end, Spirit Falls was one of the few places that really could work for this project. To round out the crew of athletes, Rafa brought in Rush Sturges and Liamm Fields, both of whom are world-class kayakers in their own right. Above is an image of Liamm going straight in on Spirit Falls.
As with any successful photo shoot, a lot of pre-planning and thought went into this assignment. Throughout the development of the Elinchrom ELB 1200, I had been working with various prototypes so I knew what they were capable of. My experience, starting with Hypersync years ago, and with the Hi-Sync features of the ELB 400 more recently, really helped me imagine what was possible with a decent sized waterfall and a world-class athlete. In particular the series of ice climbing shoots I did back in 2014 and 2015 really gave me a sense of how I could approach this whitewater kayaking shoot. But that was only the beginning of my thinking. Spirit Falls drops into a basin, and as such, this allowed me to move nearly 270 degrees around the waterfall to gain various camera angles and also stage my lights wherever I needed them, which gave us a lot of options when setting up the shots. This longer behind the scenes video produced by Red Bull, gives a lot of insight into this assignment:
For months before the assignment, I had been talking with Elinchrom about different possibilities, including rappelling behind the waterfall. I was really psyched on getting behind the curtain as the possibilities there seemed wildly different than an average portrait. Once we got to White Salmon and went to check out the waterfall, we realized there was no gap between the falls, as there usually is, where we could rappel behind the waterfall. Usually Spirit Falls is a smaller, narrow waterfall with a gap between it and the other side of the falls, not a huge curtain of water as seen in the images here. Because the entire western US had an epic winter, there was so much snowmelt this year that we had to wait until late May for water levels to get down to a runnable level. That epic winter made for epic amounts of runoff, which also meant that the waterfall was a solid hundred foot wide curtain of water when we arrived in late May.
This was a four day assignment, with one scout day and three shoot days. The scout day involved a full day of bushwhacking around different sections of the river to check out other possible shoot locations. This being the northwest, there was plenty of poison oak to deal with. We were careful, but even with care, I still came home with poison oak in several places. The scout day was a bit brutal. The incredibly hot weather and dense forest approaches didn’t help. Even so, we did manage to find a few other sections of the river that would work for additional action and lifestyle images.
After the scout day, we laid out our plan for the shoot. Before shooting any action, we wanted to get a wide variety of portrait and lifestyle images in the bag. The idea was that once we started shooting the action, if anyone got hurt that could end the entire shoot. Hence, getting a wide variety of non-action images seemed prudent. We spent the entire first day shooting portrait and lifestyle images near Spirit Falls and also at other spots on the river. We started with underwater shots having Rafa doing barrel rolls while being lit from above using a Kupo Big Boom, which is a beefy 12-foot boom arm.
To get the above image, I put my Nikon D810 into a Ewa-Marine bag with the Skyport Plus HS on top and used a 24mm lens. The reason I used a Ewa-Marine bag instead of a surf housing, like my CMT surf housing, is that I needed to be able to adjust a wide variety of settings both on the camera and on the transmitter. It took a little trial and error to dial in the settings but once we got there, we were able to get some pretty cool underwater shots and control the lighting very accurately. Afterwards, we moved on to a location that was very close to Spirit Falls, just on the opposite side of the gorge from the actual waterfall. This small waterfall was a perfect place to shoot a series of portraits and freeze the falling water, as shown below.
For the portraits above, I shot with both a Nikon D810 and with a Hasselblad H5D 50c WiFi. As you might imagine, this spot was quite wet. I wrapped the Hasselblad in a plastic cover to keep it from getting too wet. When shooting with the Nikon, I just left it naked as I have tons of experience shooting with a wide variety of Nikons in full on rain and have had not any issues. The portraits are definitely more staged than any of the other images we captured but as with all of my assignments, it isn’t always about the action, and creating a wide variety of images to show the entire experience is critical for most clients. These portraits also show just how versatile the ELB 1200 is for a wide variety of scenarios. We used the Action heads when shooting with the Hasselblad (because it has a leaf shutter and requires fast flash durations) and we used the Hi-Sync heads when shooting with the Nikon to stop the motion of the falling water.
As a side note here, I was intentionally trying to kill one of the three ELB 1200 packs we had with us on this shoot. I wanted not only to create cool images for Elinchrom’s marketing but also see just how tough these packs are in the wild. After we were done shooting the above portraits, I borrowed Rafa’s paddle and diverted a serious amount of the waterfall onto the top of the ELB 1200 with a flash head still plugged into the top of the pack. Below is a shot of it after I gave the paddle back to Rafa. We shook it off, and dried off the water on the top of the pack and tested it out. It still worked fine. I was pretty surprised as there was a lot of water hitting the pack for several seconds. With a flash head plugged into the top of the power pack there was a potentially serious failure point where water could enter the pack. Apparently Elinchrom has considered this possibility, which explains why the cables fit snuggly into the top of the pack, creating a water tight seal. After this experiment, I realized the only way to really kill the pack would be to toss it into the river, but as I wouldn’t do that with my own gear that seemed a little over the line in terms of trying to kill a pack. Note that the flash heads have slits in the back of them to cool the flash head so I did not put those naked into the waterfall.
While scouting, we found that there was a small hole just next to Spirit Falls where we could rappel behind the curtain of the waterfall. On the second day of shooting, we set up the rope and used it to rappel behind the waterfall. I have to say that this was one of the coolest things I have done in quite a few years as an adventure photographer. Dropping through a three-by-three foot opening to get behind the curtain of the waterfall was exhilarating. It felt like we landed on another planet. My enthusiasm, and Rafa’s as well, is apparent in the behind the scened video above. Tom Bear, my assistant and a stellar pro photographer in his own right, rappelled into the cave with Rafa and myself. He held the light and we worked out a few different shooting positions and lighting angles.
Here again, I put my Nikon D810 and the Skyport Transmitter into a Ewa-Marine bag to protect it. We put the ELB 1200 into a padded LowePro case and then put that into a dry bag, with the flash head cable running out of the dry bag. The flash head was protected with a heavy-duty clear plastic bag and we used gaffer’s tape to seal the plastic bag. Up top, I put a fully-charged battery onto the pack but somehow while rappelling in it got knocked around a bit, and the battery had shifted slightly. Hence, I had to take the ELB 1200 out of the dry bag and re-attach the battery while getting nailed by the spray that was a constant issue. In doing so, the entire pack got wet, including the top of the exposed battery and the bottom of the power pack. We didn’t really have any choice in the matter so we just carried on, hoping the unit would fire normally – and it worked perfectly.
This was one of the most challenging locations I have ever had to work in. While behind the waterfall, there was a consistent high-velocity spray that seemed to shoot into my ears non-stop. It was hard to even look through the camera because my eyes wold get nailed by an occasional jet of spray forcing me to rub them out and clear my vision. Additionally, the Ewa-Marine bag was soaked and any attempt to clear the front lens element just smeared the water in an unnatural way. Honestly, I am shocked we got any usable images down there at all. The image below is a two-shot panorama that is my favorite image from behind Spirit Falls. When we ascended the rope (using mechanical ascenders) to get out of there, I was so jacked up at that point I couldn’t contain my excitement.
After our adventure behind Spirit Falls, we set to work on creating the action images. With one light above the waterfall and another on the opposite side of the gorge, over 100-feet away, which acted as a fill light, I set to work to find the actual shooting angles. My first choice was to get as close as possible to the action and shoot while hanging from a rope right in front of the waterfall. This resulted in some pretty amazing images as shown below. In these images Rafa and the crew have run the same line multiple times for me to dial in my timing and catch them at just the right spot.
To show the effect of the flash, below are images shot at the same exposures but without the flash. These before and after images show just how powerful and important the flash was in creating these images. Also, note that these images are underexposed because the in-camera settings are set to expose the background correctly so no highlights are blown out. In the case of the right image below, I adjusted the exposure for the sky, which is barely visible and which explains why the image is so dark. Also, because I was shooting with a Nikon D810, which has an incredible dynamic range, those dark areas in the background were easily lifted in the post-processing without adding much if any noise to the final image.
All of the action images were created using Elinchrom’s Hi-Sync technology that allows the flash to sync at any shutter speed. For most of the action images we shot with shutter speeds ranging from 1/2,500th second up to 1/4,000th second to freeze the action. When shooting whitewater kayaking, it has been my experience that if you want to freeze the motion of the kayaker you need to use a shutter speed of at least 1/1,500th second or higher. Elincrhom’s Hi-Sync technology allowed us to freeze the motion in a way that would otherwise be quite difficult to pull off with flashes.
Before the shoot, I didn’t realize that Liamm and Rush were game to run the falls more than a few times. Luckily for me, they both dropped Spirit almost as many times as Rafa did, which allowed me to get my timing dialed in and also gave us quite a few extra images. After shooting a few rounds right in front of the waterfall, I climbed back up and changed my shooting position. I was very conscious of how many times the kayakers were dropping over Spirit Falls and we made sure we were ready for each descent since we only got one image per drop. The image I had in mind before the shoot was to replicate the ice climbing images I mentioned above. I moved over to the far side of the gorge, so that I was straight on with the waterfall curtain and used a 70-200mm lens to frame up a wider shot, as shown in the images below. I also zoomed in a bit to get a tighter shot once I got the timing down. These images from a little farther away show the entire waterfall and give a better sense of the height of the water fall and the kayakers position on it.
At the end of the second day, it felt like I had gone caving. I was soaked from head to toe and coated in mud as shown in the behind the scenes image below captured by Marv Watson. Amazingly, my Nikon was just fine. The camera and the 14-24mm lens I was using while hanging only a few feet away from the waterfall were soaked repeatedly but never seemed to flinch. I must have wiped the lens off a hundred times or more while hanging right in front of the waterfall.
One thing I haven’t noted here yet is the approach to Spirit Falls. It isn’t that long or hard of a hike to get down to Spirit Falls, though it is quite steep in a few sections, but when you carry in a fully loaded 90-pound (40-Kg) backpack that simple approach becomes a whole lot more interesting. On all three days that we shot down at Spirit Falls, Tom and I carried in huge packs with the cameras and lighting gear. While going down the 1,000 feet to Spirit Falls wasn’t so challenging, hiking back out each day was a lesson in pure suffering. Thank God the ELB 1200s were as light as they are. It wasn’t just the lighting gear that weighed us down, we also had quite a bit of climbing gear as well as full dry suits to use behind the waterfall.
The third and final day of the shoot was planned as a backup – or pick up day. I didn’t know how many times the kayakers would physically be able to run the Spirit. On the morning of the third day Rush admitted he was quite sore. All three kayakers were all absorbing a serious impact every time they ran Spirit. In fact, they told me they had never run it that many times in a single day. Appreciative of their efforts, I asked if we could go back and do just a few more runs so I could dial in a tighter shot. I also wanted to shoot a few images with Rush or Liamm standing on a rock below Spirit Falls, showing the role of the safety boater and giving us a wider range of images.
Above are a few images shot on the third and final day of the assignment. Above left, we shot all three kayakers running a rapid known as Chaos, which is actually the most dangerous rapid on the entire four-mile stretch of the Little White Salmon. For this image of Rush Sturges we used two strobes, one on Spirit Falls and another from above lighting up Chaos. In the above right image, we had Rush Sturges stand below the falls on a rock with the swirling cauldron of water below him. Liamm Fields is dropping over Spirit Falls while Rush holds a safety rope. When we created this image, it opened up a whole new set of images I hadn’t thought of before the shoot. After showing the images to Rafa and crew, it was obvious we needed to shoot some other versions of this so Rafa opted to run Spirit one more time to access this rock below the falls. We finished off the shoot by capturing a series of images of Rafa standing on the rock below Spirit Falls.
This last shot, shown above, might be the best image from the entire shoot. It is certainly the best lifestyle-type image from the shoot in my opinion. We created so many stellar images that it is very difficult to edit these images. The first image, at the top of this blog post is another of my favorites, as is the one from behind the waterfall. I have several favorite action images of Rafa, many of which are shown here, but I can’t actually decide which one is the best of the best. Please feel free to voice your opinion in the comments section.
I have to thank the entire team that worked so hard on this assignment. Bill Stengel, our one man band behind the scenes video guru, who lugged a full RED Epic kit down to Spirit Falls — and captured some amazing behind the scenes footage shown in the video above, Tom Bear, my assistant, and also Marv Watson and Jorge Henao from Red Bull Photography who shot the behind the scenes stills and also carried down a few extra items for us each day. Without your help gentlemen, and that of our illustrious athletes, this shoot just would not have been possible and the resulting images would have been far less interesting. Lastly, my thanks again to Elinchrom and Red Bull Photography for making this happen. If you would like to see more behind the scenes stills jump on over to the Red Bull Photography website and check out the article they posted from this shoot that includes quite a few additional still images from the shoot and also Marv and Jorge’s behind the scenes still images.
This really was one of the best shoots of my entire career. I have set for myself a very high watermark that will be hard to surpass in the future. I am very proud of what we have created here both because it wasn’t a given, and we all had to work insanely hard to pull it off. Thank you to everyone who has posted on social media with feedback. It has been very encouraging to get such amazing feedback and see the reaction to this set of images.
As a photographer and whitewater kayaker, I’m blown away with these images, Michael — truly some of the best I’ve seen. And thanks for the in-depth BTS info — shows how much work really goes into making outstanding unique photographs.
[…] the last few months I have been working with a very-near-production version of the ELB 1200 for the Lighting the Spirit assignment for Elinchrom and Red Bull Photography. As I haven’t worked with a full production […]
[…] 2017 was an incredible year for me. My Lighting the Spirit project for Elinchrom and Red Bull Photography was the highlight of the year. Working with Rafa […]
[…] 1200. This image was created during the Lighting the Spirit project, which was described in detail here on the blog. This image was created using two ELB 1200 strobes with the HS Flash heads, a Nikon D810 with a […]
I am extremely excited to announce that I will be teaching a CreativeLIVE course on Advanced Lighting for Adventure Photography. This course is sponsored by Red Bull Photography. In this course, we will be diving into the very exciting, and relatively new lighting techniques like Hi-Sync (HS), as well as many other advanced lighting techniques, which can be used to for a wide variety of applications. In this class we will be capturing a few different adventure sports including rock climbing, cyclocross and trail running with top Red Bull Athletes. This course will be Live on July 17th and 18th, and available for purchase during and after those dates. As usual with CreativeLIVE classes, this course will be broadcast for FREE on the CreativeLIVE website on the 17th and 18th of July. I hope you can join us and learn more about the incredible lighting options available with these new techniques. To register for the class and get more information, as well as check out the cool promo video, go to creativelive.com.
Hi-Sync (and Hypersync) lighting techniques have opened up entirely new possibilities in the lighting genre. Especially for adventure photographers who often need to light the subject from far away, as shown in the image below, these new lighting techniques are allowing us to create new and never before seen images. This is a very exciting time in photography.
My thanks to CreativeLIVE and Red Bull Photography for this opportunity. Stay tuned for more details.
HOLY MOLY! I’ve been binge-watching your CreativeLIVE sessions since they ran live and now in re-broadcast. I think my world has just changed. I’m a street shooter who’s been living in the Smoky Mountains and I’ve been looking for a way to leverage where I live with my photography. It’s home to some great outdoor activities (kayaking, hiking, cycling, etc.) – Thank you an exceptional class and the inspiration. The timing for this was too perfect.
DavidJuly 24, 2017 - 9:56 am
Michael
If you were to purchase a set up to cover adventure sports and portraits what would you recommend.
2 each ELB 1200’s?
or 1 ea. ELB 400 and a 1200?
Which 1 or 2 light modifiers.. Octa or deep octa or 1 ea.?
…and of course 1 ea. or 2 ea. high performance reflector?
…also I would get the kit on Adorama which includes the pro.. action.. and hi synch heads.
I shoot with D800e and D4 and Hasselblad 5DX with Phase One Back 100mp.
For a minimum kit, I’d go with one each of the ELB 400 and ELB 1200. Note that for the Hasselblad and leaf shutters you will need the Action heads. No need for the Pro head, the HS and the Action heads are the only ones I use. The high performance reflector is great for sports, not so much for portraits. The Deep Octa is nice as well. You can also rent a few different ones and see which you like. I have tons of light modifiers and use a wide variety of them. Hope this helps.
The Spring 2017 issue of the Michael Clark Photography Newsletter is now available for download. If you’d like to sign up for the Newsletter just drop me an email and I’ll add you to the mailing list.
This issue includes an editorial with recent news, a review of Wacom’s Intuos Pro graphic tablet, an article detailing a recent assignment with the Red Bull Air Force, an editorial entitled The Purple Cow, discussing a book by Seth Godin, and much more.
The Michael Clark Photography Newsletter goes out to over 8,000 thousand photo editors, photographers and photo enthusiasts around the world. You can download the Spring 2017 issue on my website at:
I realize including the words “Color Management” in the title of this blog post will probably limit the number of folks that actually read this but I hope many will get past that and see just how critical this important topic is when working up still images or grading video footage. Color management, which involves a whole host of things–part of which is calibrating and profiling your monitor–is the cornerstone of any digital workflow involving photography or video. In fact, color management, including how your set up your workspace, what monitor you use and how you calibrate and profile that monitor is much more important than which camera or lens you use, or how many megapixels your camera has.
“In fact, color management, including how your set up your workspace, what monitor you use and how you calibrate and profile that monitor is much more important than which camera or lens you use, or how many megapixels your camera has.”
I decided to write this blog post after having several instances in workshops where I talked about the importance of color management and met with some resistance. By just describing the issues related to color and digital photography, and how monitors out of the box for the most part are not color calibrated to any known color space, I have found that most people come up with a response that goes something like “Well, the colors look fine to me.” In a recent worksh0p, I ran through the entire digital workflow from ingest to a finished print and it was when the print rolled off the Epson ink jet printer looking pretty much identical to the screen that the importance of color management became obvious. Previous to this, the client had just let the printer determine the colors in the final print and that was a disaster in terms of color accuracy compared to using a robust color management strategy. Just because your monitor looks nice doesn’t mean it shows accurate color or is calibrated as it needs to be for working up images.
In my e-book entitled A Professional Photographer’s Workflow: Using Adobe Lightroom and Photoshop, I have an extensive chapter on color management. That chapter has more information about color management than I have seen anywhere else. And when I say anywhere else, I mean everywhere. I have looked hard to find this information for myself and I have pieced it all together after consulting with many color experts and figuring it out for myself. The e-book gets into the nitty-gritty details of color management for photographers and also for those capturing video. Here in this blog post, I don’t have time or space to relay everything in that 57-page chapter but I hope to at least give an introduction to the issues.
First off, as can be seen in the top image of this blog post, controlling the lighting and the brightness of your workspace is critical. You can also tell how crazy I get about color by looking at the walls of my office in that image. I spent over $300 painting my office with color calibrated 18% gray paint I got from GTI. I am not sure I would do that again. But, the point is you don’t want neon pink walls or even tinted walls in your work space if color is important to you. A way to control the lighting in your office will also help. I put up the blinds when working on images so all exterior light is blocked out. Also, making sure the color of the light in your office is Daylight balanced is important as well. Lastly, as far as environment, I wear black t-shirts when working on images. A bright red (or any other bright color) shirt can and will reflect off your monitor and alter your sense of color.
Second, as I have already stated the monitor is the most important piece of photographic equipment you own. I use an Eizo monitor that shows the entire Adobe RGB color space. With DSLRs, most of us typically shoot in the Adobe RGB color space. As shown below, the sRGB color space, which is what 98% of all monitors show is quite a bit smaller than the Adobe RGB color space. Hence, when working on images, if you are working with a normal sRGB monitor then you aren’t seeing all the colors in your image and things can go very wrong in a hurry. [Note: If you don’t know what color space your monitor is then it is sRGB or an even smaller color space.] Another part of this equation is that not all monitors are equal. Most monitors vary greatly from corner to corner in terms of color and brightness.
Third in this series of things to consider about color management, is calibrating and profiling your monitor using a device like the X-Rite i1 Display Pro (shown below on the far left) or i1 Photo Pro 2 (shown below on the far right) is critical. The i1 Display Pro is about $250 and is a great basic monitor calibration device. The i1 Photo Pro 2 costs considerably more but if you need the functionality it offers then it is worth the price. The Colormunki is another good device that I can recommend, though it is a bit dated compared to the first two options. These devices will dial in your monitor so that they show accurate, known and repeatable colors that other devices can replicate. If you aren’t calibrating and profiling your monitor then before you ever start working up an image in Lightroom or Photoshop your color is already off in its own unknown, whacky color space, and doesn’t relate to any other known color space. You might get lucky and your monitor isn’t that far off, but you may not. If you have ever tried to make a print you know what I mean.
In my workshops I state that working up your images on a monitor that isn’t calibrated and profiled is a complete waste of time. I stand by that statement. If you pay thousands of dollars for a high-end camera and won’t buy the $250 device that will help make sure you are seeing accurate colors on your monitor then I don’t know what to say. At the very least, even if you don’t buy an Adobe RGB monitor, buy a monitor calibration device like those shown here and calibrate your monitor. There is a lot more to creating a solid color management system, but calibrating and profiling your monitor is at least a start.
The last part of the puzzle with color management is buying a decent photo printer and making a print after you have calibrated and profiled your monitor. If the print, viewed under controlled, accurate daylight viewing conditions (like in a print viewing box) doesn’t exactly match your monitor then your monitor needs to be adjusted until it does match. This is how you figure out if you correctly calibrated your monitor. Of course, printing involves knowing about printer profiles, or possibly having to make your own custom profiles, which is where the X-Rite i1 Photo Pro 2 excels, as shown below. Printing is not easy, especially if you haven’t dialed in your color management. I think this is a big reason why lots of digital photographers stopped printing their images. But, with excellent color management you can usually hit “Print” once and get a print that looks extremely close to what your monitor is showing if you view it in the correct lighting conditions.
I realize this blog post seems like a public service announcement, and in some ways it is. Digital presents a whole host of issues and problems for digital photographers and very few understand the issues around color management well. I have only scratched the surface here. There is a lot more to consider if you are looking to dial in your color management. If you want all of the answers, I highly recommend my e-book, A Professional Photographer’s Workflow: Using Adobe Lightroom and Photoshop. I know many might find it offensive that I am promoting a book when everything seems to be online for free but I have spent over ten years learning everything I could possibly find out about color management and all of that knowledge is contained in this e-book. This e-book is also a real book that is 500-pages long and packed with info. It isn’t your average e-book, as the testimonials on my website indicate. The chapter on Color Management alone would be worth the price of this book. If you are serious about photography, do yourself a favor and get serious about color management.
No Michael it does not seem as a public service anouncment for somebody who respects their job and their customers. I have read that the I display pro comes in two different versions. The OEM version and the non OEM. The main difference is that the OEM version is able to work with whatever calibration software we choose. Are you aware of that?
Thanks for the helpful information! Keep up the good work!
Thomas – I wasn’t aware of that. Thanks for the info and the comment. I use my i1 Pro with both the X-Rite software and with the Eizo software so I use multiple software options with it as well.
Ilford recently ran a series of ads and e-promos with an image of me holding a large print (as shown above). A few years ago I signed on with Ilford as one of the Ilford Masters. It is an honor to be among such an elite group of photographers working with Ilford including Sebastião Salgado, Eric Meola, Gregory Heisler, and Seth Resnick among others. The caption at the top of the ad shown above reads:
“When you print an image you see things you don’t see in the image on a monitor. A print feels more valuable because of the effort associated with making the print and because you are seeing the final image the way images were “traditionally” meant to be seen. The paper lends the print a lot of value as well, especially if it is a thick fine art paper that helps make the image look better. Not only do you get a tactile feel for the image but you can interact with the image in a way that is not possible on a monitor. Also, the size of the image lends a huge amount to the impact it makes on the viewer. When printed large, some images come alive like they never can on any monitor. As a photographer, the emotional response is one of pride in the image. For my customers, they hopefully have a sense of awe about the image and the effort that went into it.”
Ilford also recently posted an interview with yours truly on the Ilford Blog. Check it out below.
My favorite papers from Ilford are Gold Fibre Silk, which is my mainstay go to paper for large fine art prints, Gold Mono Silk for black and white prints, and Textured Cotton Rag for those times when I want a beefier, textured fine art paper. I also use a few of their other papers like their excellent Semigloss Duo and Gold Raster Silk in my portfolios and for test prints here in the office. If you haven’t ever printed your images before, I highly recommend the papers listed above. Gold Fibre Silk in particular makes your images come to life and reproduces extremely accurately the colors I see on my monitor.
My thanks to Peter Ogilvie who helped me out by shooting this portrait in his studio. Also, my thanks to Ilford for all their support over the last few years and for the amazing paper. If you would like to order a fine art print all of the details are on my website here. Any and all of my images are available as fine art prints.
Red Bull Photography recently posted an interview with me about my most recent assignment for Red Bull with the Red Bull Air Force at their annual training camp near Eloy, Arizona. On that assignment, I spent two and a half days with the Red Bull Air Force, which is Red Bull’s sky diving team based in the USA. I shot over 20,000 images, many with remote cameras. Marv Watson, from Red Bull Photography here in the USA, wanted to interview me to get some behind the scenes info on how I covered this daunting assignment.
I have shot several assignments with the Red Bull Air Force over the last seven years. I consider many on the team to be good friends and it is always a great time hanging out with this crew. The Red Bull Air Force is far and away one of the best group of sky divers anywhere in the world, which is why when Hollywood needs BASE jumpers, wingsuit BASE jumpers or sky divers they usually work with a few members of the Red Bull Air Force. As an example, Jon DeVore was recently in the new Point Break movie, and he and Mike Swanson were also in one of the Transformers movies a few years back as well. Below is an image of Jon DeVore and Luke Aikins jumping from the skids of a Red Bull helicopter, which was flown by Felix Baumgartner, with Kirby Chambliss flying a stunt plane just below the heli while practicing maneuvers at Kirby Chambliss’ ranch near Eloy, Arizona. This image was thought up by Jon and we spent much of the second morning planning out how we would capture it.
Above is a behind the scenes shot of a portrait session with Felix Baumgartner, one of Red Bull’s most famous skydivers. He was also a part of the Red Bull Stratos project, where on October, 14th, 2012, he became the first human being to break the speed of sound in free fall, while skydiving out of the stratosphere. In the above behind the scenes image some have noticed that I am wearing a climbing harness. The reason I am wearing a harness is that between portrait sessions with each Red Bull Air Force team member I was jumping in and out of airplanes and helicopters where I was clipped in while shooting out an open door of the aircraft. The portraits, as shown here, were captured in between flights on an ad hoc basis. I was wearing a harness for most of the assignment. Below is an image of Red Bull Air Force team member Jeffrey Provenzano, which was created using the same lighting setup as shown above.
In yet another photo op dreamed up by Jon DeVore, we attached a GoPro camera to the bottom of the Red Bull helicopter and then had some team members hang from the skids before dropping into a sky dive. From left to right are Jon DeVore, Sean MacCormac, Charles Bryan and Jeffrey Provenzano. The helicopter was being flown by Felix Baumgartner. Below is a shot of the three different camera systems I was shooting with for this assignment, including a GoPro Hero 5, a Nikon D4 (and also a D500 and D810) as well as a Hasselblad H5D 50c WiFi medium format digital camera.
You can read the whole interview over on the Red Bull Photography website. My thanks to Marv for the interview and to Red Bull for the assignment. I’ll have a more in-depth and expanded behind the scenes article on this assignment in my Spring 2017 Newsletter here in a few months. Stay tuned for that.
 The Summer 2017 issue of the Michael Clark Photography Newsletter is now available for download. If you’d like to sign up for the Newsletter just drop me an email and I’ll add you to the mailing list.
.jpg)
.jpg)
.jpg)
.jpg) For the portraits above, I shot with both a Nikon D810 and with a Hasselblad H5D 50c WiFi. As you might imagine, this spot was quite wet. I wrapped the Hasselblad in a plastic cover to keep it from getting too wet. When shooting with the Nikon, I just left it naked as I have tons of experience shooting with a wide variety of Nikons in full on rain and have had not any issues. The portraits are definitely more staged than any of the other images we captured but as with all of my assignments, it isn’t always about the action, and creating a wide variety of images to show the entire experience is critical for most clients. These portraits also show just how versatile the ELB 1200 is for a wide variety of scenarios. We used the Action heads when shooting with the Hasselblad (because it has a leaf shutter and requires fast flash durations) and we used the Hi-Sync heads when shooting with the Nikon to stop the motion of the falling water.
For the portraits above, I shot with both a Nikon D810 and with a Hasselblad H5D 50c WiFi. As you might imagine, this spot was quite wet. I wrapped the Hasselblad in a plastic cover to keep it from getting too wet. When shooting with the Nikon, I just left it naked as I have tons of experience shooting with a wide variety of Nikons in full on rain and have had not any issues. The portraits are definitely more staged than any of the other images we captured but as with all of my assignments, it isn’t always about the action, and creating a wide variety of images to show the entire experience is critical for most clients. These portraits also show just how versatile the ELB 1200 is for a wide variety of scenarios. We used the Action heads when shooting with the Hasselblad (because it has a leaf shutter and requires fast flash durations) and we used the Hi-Sync heads when shooting with the Nikon to stop the motion of the falling water..jpg)
.jpg)
.jpg)
.jpg)
.jpg)
.jpg)
.jpg)
.jpg)
.jpg)
.jpg) Above are a few images shot on the third and final day of the assignment. Above left, we shot all three kayakers running a rapid known as Chaos, which is actually the most dangerous rapid on the entire four-mile stretch of the Little White Salmon. For this image of Rush Sturges we used two strobes, one on Spirit Falls and another from above lighting up Chaos. In the above right image, we had Rush Sturges stand below the falls on a rock with the swirling cauldron of water below him. Liamm Fields is dropping over Spirit Falls while Rush holds a safety rope. When we created this image, it opened up a whole new set of images I hadn’t thought of before the shoot. After showing the images to Rafa and crew, it was obvious we needed to shoot some other versions of this so Rafa opted to run Spirit one more time to access this rock below the falls. We finished off the shoot by capturing a series of images of Rafa standing on the rock below Spirit Falls.
Above are a few images shot on the third and final day of the assignment. Above left, we shot all three kayakers running a rapid known as Chaos, which is actually the most dangerous rapid on the entire four-mile stretch of the Little White Salmon. For this image of Rush Sturges we used two strobes, one on Spirit Falls and another from above lighting up Chaos. In the above right image, we had Rush Sturges stand below the falls on a rock with the swirling cauldron of water below him. Liamm Fields is dropping over Spirit Falls while Rush holds a safety rope. When we created this image, it opened up a whole new set of images I hadn’t thought of before the shoot. After showing the images to Rafa and crew, it was obvious we needed to shoot some other versions of this so Rafa opted to run Spirit one more time to access this rock below the falls. We finished off the shoot by capturing a series of images of Rafa standing on the rock below Spirit Falls..jpg)
.jpg)
.jpg) I am extremely excited to announce that I will be teaching a CreativeLIVE course on
I am extremely excited to announce that I will be teaching a CreativeLIVE course on .jpg)
.jpg) My thanks to CreativeLIVE and Red Bull Photography for this opportunity. Stay tuned for more details.
My thanks to CreativeLIVE and Red Bull Photography for this opportunity. Stay tuned for more details.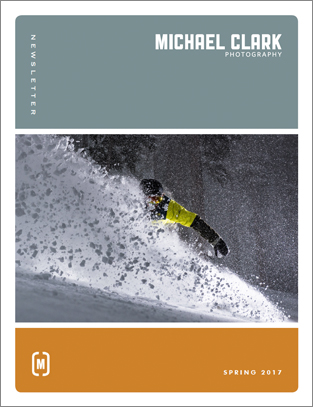
.jpg)
.jpg)
.jpg)
.jpg)
.jpg)
.jpg)
.jpg)
.jpg) Above is a behind the scenes shot of a portrait session with Felix Baumgartner, one of Red Bull’s most famous skydivers. He was also a part of the Red Bull Stratos project, where on October, 14th, 2012, he became the first human being to break the speed of sound in free fall, while skydiving out of the stratosphere. In the above behind the scenes image some have noticed that I am wearing a climbing harness. The reason I am wearing a harness is that between portrait sessions with each Red Bull Air Force team member I was jumping in and out of airplanes and helicopters where I was clipped in while shooting out an open door of the aircraft. The portraits, as shown here, were captured in between flights on an ad hoc basis. I was wearing a harness for most of the assignment. Below is an image of Red Bull Air Force team member Jeffrey Provenzano, which was created using the same lighting setup as shown above.
Above is a behind the scenes shot of a portrait session with Felix Baumgartner, one of Red Bull’s most famous skydivers. He was also a part of the Red Bull Stratos project, where on October, 14th, 2012, he became the first human being to break the speed of sound in free fall, while skydiving out of the stratosphere. In the above behind the scenes image some have noticed that I am wearing a climbing harness. The reason I am wearing a harness is that between portrait sessions with each Red Bull Air Force team member I was jumping in and out of airplanes and helicopters where I was clipped in while shooting out an open door of the aircraft. The portraits, as shown here, were captured in between flights on an ad hoc basis. I was wearing a harness for most of the assignment. Below is an image of Red Bull Air Force team member Jeffrey Provenzano, which was created using the same lighting setup as shown above..jpg)
.jpg) In yet another photo op dreamed up by Jon DeVore, we attached a GoPro camera to the bottom of the Red Bull helicopter and then had some team members hang from the skids before dropping into a sky dive. From left to right are Jon DeVore, Sean MacCormac, Charles Bryan and Jeffrey Provenzano. The helicopter was being flown by Felix Baumgartner. Below is a shot of the three different camera systems I was shooting with for this assignment, including a GoPro Hero 5, a Nikon D4 (and also a D500 and D810) as well as a Hasselblad H5D 50c WiFi medium format digital camera.
In yet another photo op dreamed up by Jon DeVore, we attached a GoPro camera to the bottom of the Red Bull helicopter and then had some team members hang from the skids before dropping into a sky dive. From left to right are Jon DeVore, Sean MacCormac, Charles Bryan and Jeffrey Provenzano. The helicopter was being flown by Felix Baumgartner. Below is a shot of the three different camera systems I was shooting with for this assignment, including a GoPro Hero 5, a Nikon D4 (and also a D500 and D810) as well as a Hasselblad H5D 50c WiFi medium format digital camera..jpg)


